
Cisco Start ルータ C841M J (C841M-4X-JSEC/K9)(以後本体と表示します。)を工場出荷状態に戻してみます。
情報源は、本家になります。自分でできるか試してみることにします。
本体をリセットして初期化する
準備する
USBメモリーを使用して初期化を行いますので、USBメモリーを準備しておきます。
ここを参考に、PCと本体とをシリアルコンソールで接続し、コンソールで入力できるようにしておきます。

Windows上のUbuntuからシリアルコンソールを使う
Windows Subsystem for Linux (WSL)上のUbuntuで、シリアルコンソールを使って、Cisco 800M サービス統合型ルータC841M-4X-JSEC/K9と接続できるようにします。
k-itc.com
2020.01.16
デフォルト設定ファイルをダウンロード
1.デフォルトの設定ファイルを本家のここを右クリックして[ファイルを保存]します。左でクリックするとブラウザに設定ファイルの内容を表示します。
2.ダウンロードするファイルはテキストファイルになっており、準備しておいたUSBメモリーへダウンロードします。
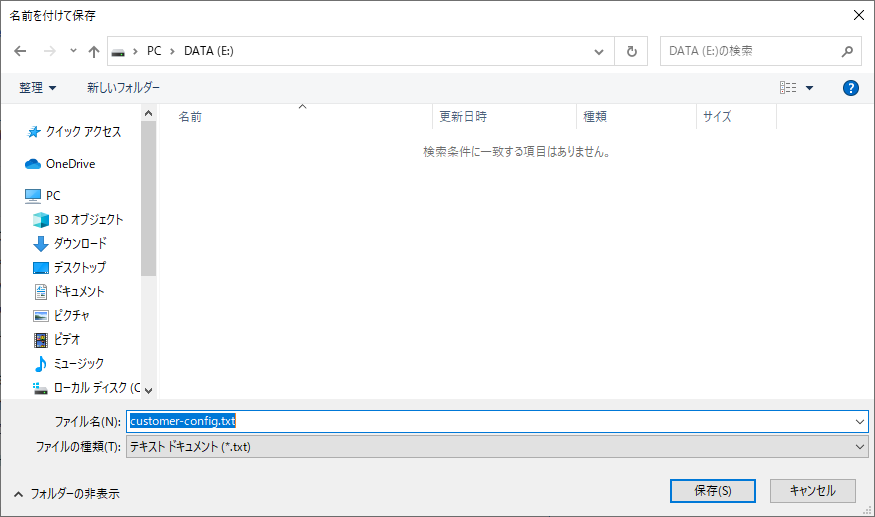
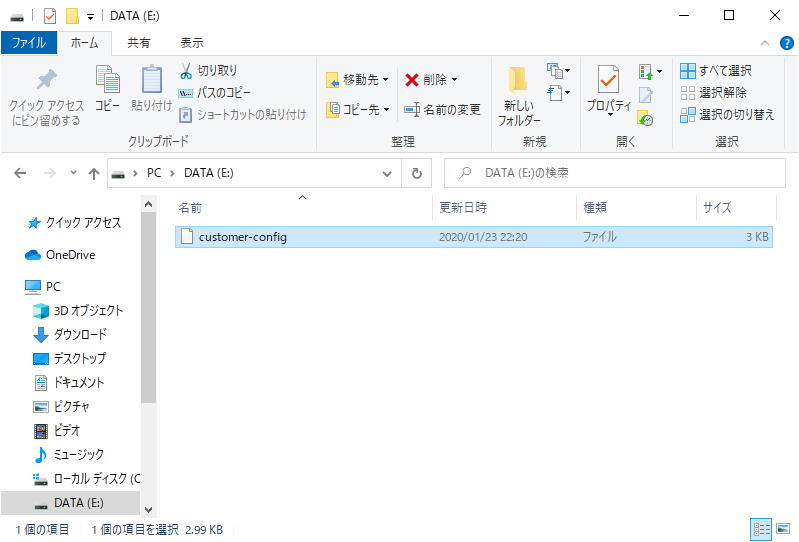
3.ダウンロードしたファイルの拡張子を削除します。
- [customer-config.txt] → [customer-config]
本体をリセットする
1.設定ファイルを保存したUSBメモリーを本体のUSB端子に挿入します。
2.本体の[リセット]ボタンを5秒以上押します。
3.しばらくすると、コンソールで次のように表示しますので、[初期ユーザー名]と[初期パスワード]を入力します。
- ユーザ名 ⇒ cisco、初期パスワード ⇒ cisco
-----------------------------------------------------------------------
Cisco Configuration Professional (Cisco CP) is installed on this device.
This feature requires the one-time use of the username "cisco" with the
password "cisco". These default credentials have a privilege level of 15.

YOU MUST USE CISCO CP or the CISCO IOS CLI TO CHANGE THESE
PUBLICLY-KNOWN CREDENTIALS

Here are the Cisco IOS commands.

username <myuser>  privilege 15 secret 0 <mypassword>
no username cisco

Replace <myuser> and <mypassword> with the username and password you want
to use.

IF YOU DO NOT CHANGE THE PUBLICLY-KNOWN CREDENTIALS, YOU WILL
NOT BE ABLE TO LOG INTO THE DEVICE AGAIN AFTER YOU HAVE LOGGED OFF.

For more information about Cisco CP please follow the instructions in the
QUICK START GUIDE for your router or go to http://www.cisco.com/go/ciscocp
-----------------------------------------------------------------------


User Access Verification

Username:cisco
Password:
% Password expiration warning.
-----------------------------------------------------------------------

Cisco Configuration Professional (Cisco CP) is installed on this device
and it provides the default username "cisco" for  one-time use. If you have
already used the username "cisco" to login to the router and your IOS image
supports the "one-time" user option, then this username has already expired.
You will not be able to login to the router with this username after you exit
this session.

It is strongly suggested that you create a new username with a privilege level
of 15 using the following command.

username <myuser> privilege 15 secret 0 <mypassword>

Replace <myuser> and <mypassword> with the username and password you
want to use.

-----------------------------------------------------------------------

yourname#
- 初期パスワードは、1回のみ入力できます。他のパスワードに変更する必要があります。
- 初期パスワード入力後、パスワードを変更せずに何もしないで放置しておくと、タイムアウトが発生し、ログインできなくなってしまいますので、初期パスワードを入力したら、すぐに新しいパスワードを設定しましょう。
4.[ユーザー名]と[パスワード]を入力して新しいユーザーを作成します。
設定する[ユーザー名]と[パスワード]の例
- ユーザー名 ⇒ hoge
- パスワード ⇒ password
- 権限 ⇒ privilege 15:特権EXECモード、 privilege 1:ユーザーEXECモード
yourname#configure terminal
Enter configuration commands, one per line.  End with CNTL/Z.
yourname(config)#username hoge privilege 15 secret password
yourname(config)#exit
yourname#
5.デフォルトの[cisco]を使用しないようにします。
yourname#configure terminal
Enter configuration commands, one per line.  End with CNTL/Z.
yourname(config)#no username cisco
yourname(config)#exit
yourname#
5.設定を保存します。
yourname#copy running-config startup-config
Destination filename [startup-config]?
Building configuration...
[OK]
yourname#
ホスト名の設定
本体を初期化すると、[hostname]が[yourname]に設定されていますので変更しておきます。ここでは[Router]に設定しています。
yourname>enable
yourname#show running-config | i hostname
hostname yourname
yourname#configure terminal
Enter configuration commands, one per line.  End with CNTL/Z.
yourname(config)#hostname Router
Router(config)#exit
Router#copy running-config startup-config
Destination filename [startup-config]?
Building configuration...
[OK]
Router#disable
Router>
- これでルーターの初期化は完了になります。

コメント